Configuration of SAML Identity Provider
This document outlines the process for configuring integrated centralised identity and access management control. Key benefits are Single Sign-On experience and possibility to manage organisation users and Willba access in centralised way.
This document outlines step-by-step guide for Google Workspace SAML identity provider configuration. This documentation is relevant for Willba customer company IT person who has access to the company's Google Workspace admin.
The configuration process is divided into following steps.
Step 1: App Setup
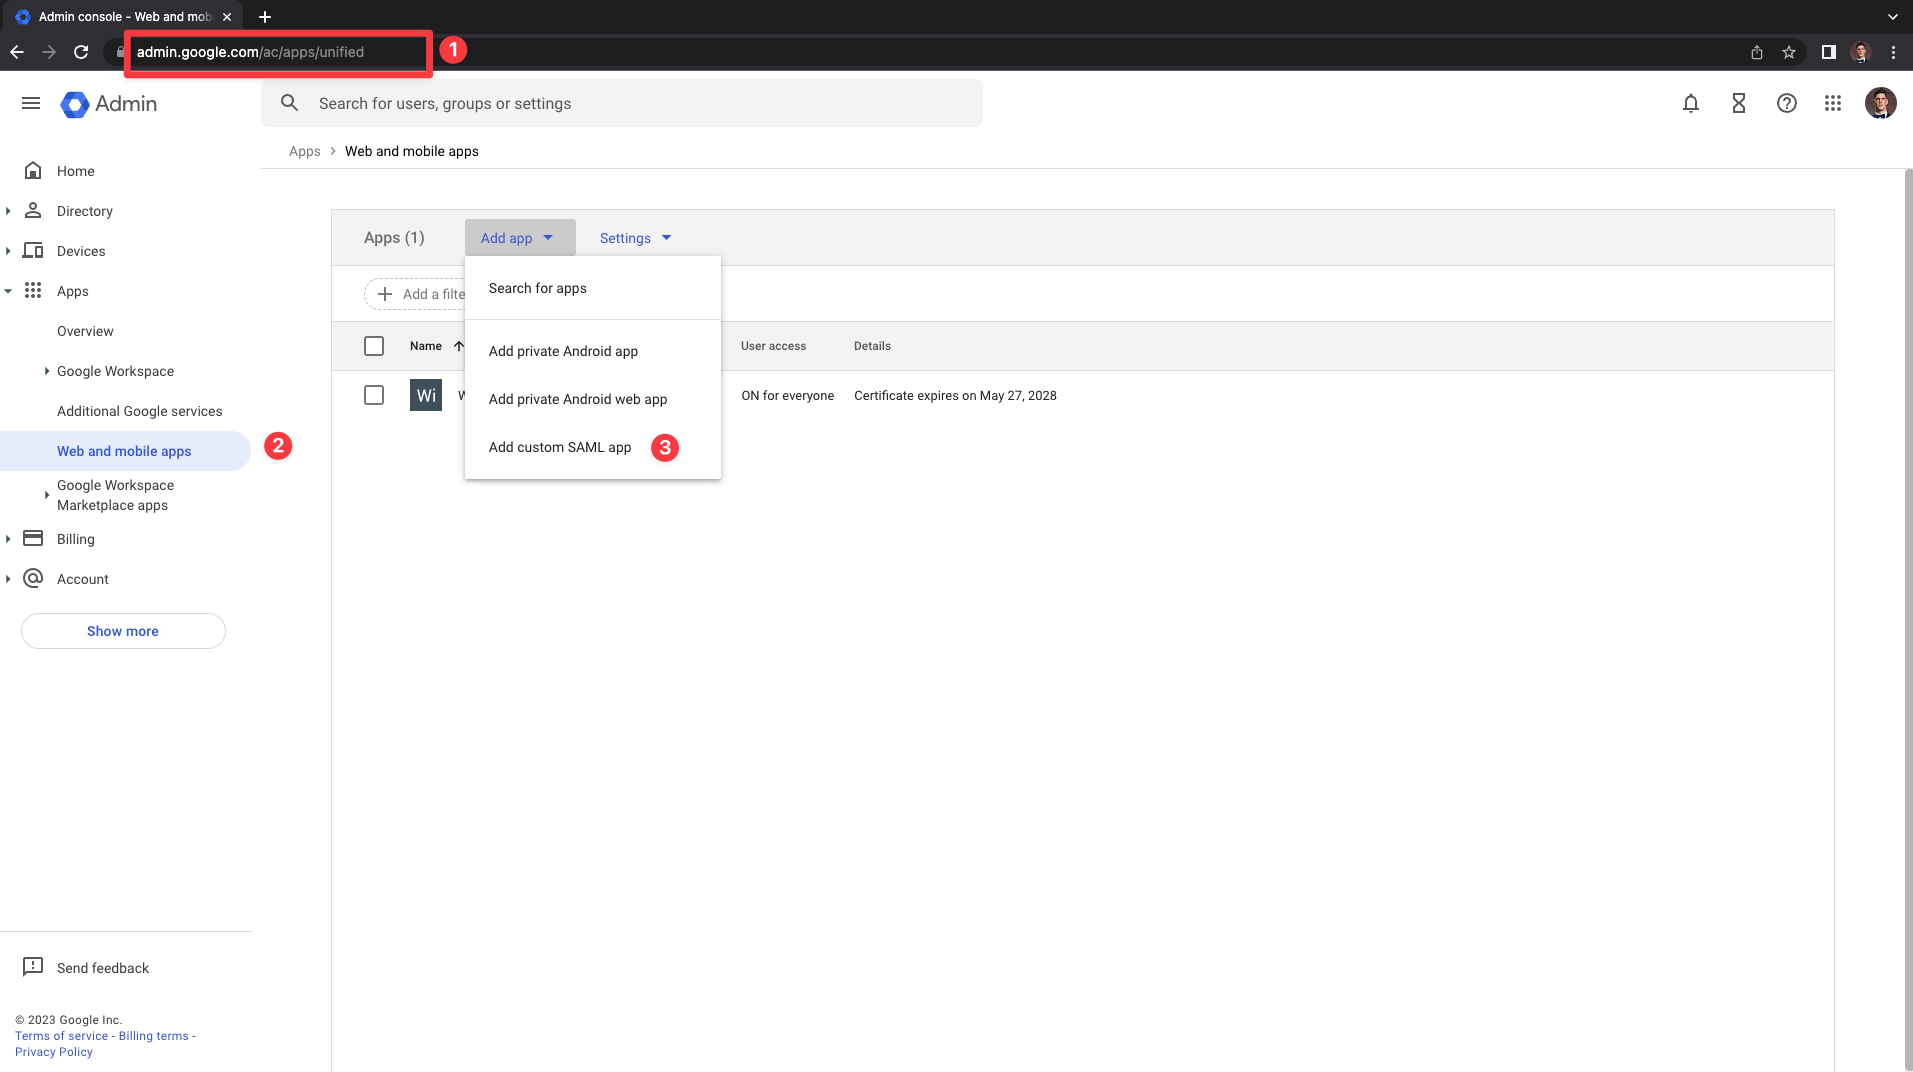
- Navigate to the Google Workspace Admin Panel.
- Select
Appsfrom the side menu, then click onWeb and mobile apps. - Click on the
Add appbutton. - In the dropdown menu that appears, select
Add custom SAML app.
Step 2: App Configuration
- Name your new app
Willba. - Click
Continueto proceed to the next step. - Download the metadata file. This file will be needed for communication between Willba and Google Workspace, so ensure you store it securely.
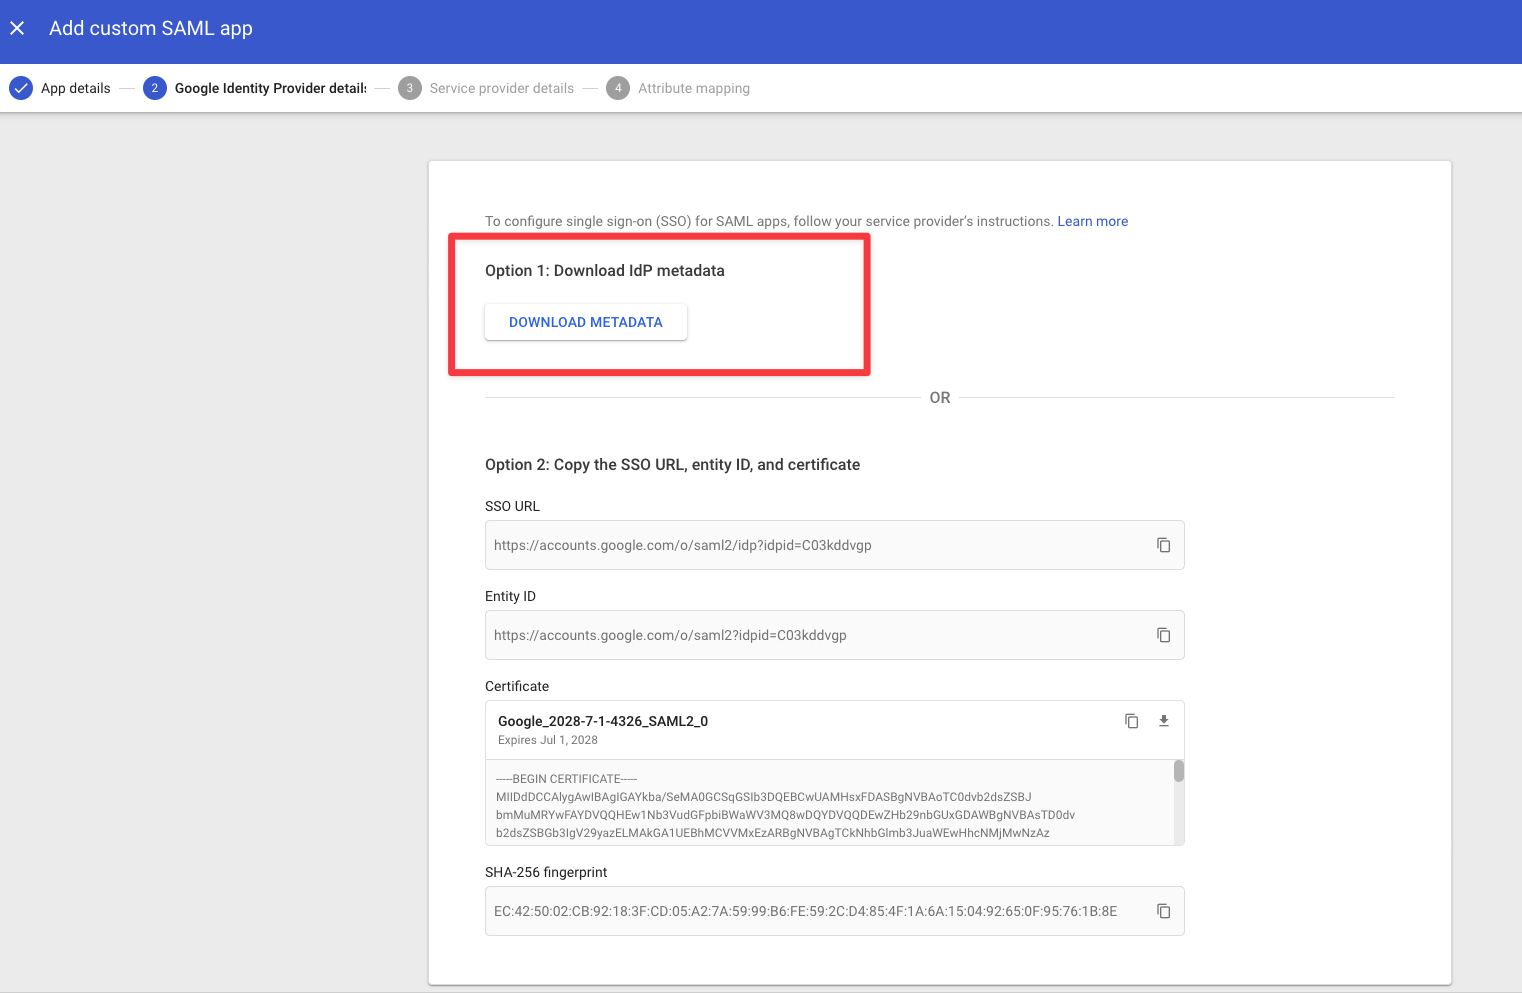
- Share the downloaded metadata file with your Willba contact person.
- Click
Continueto move to the next step.
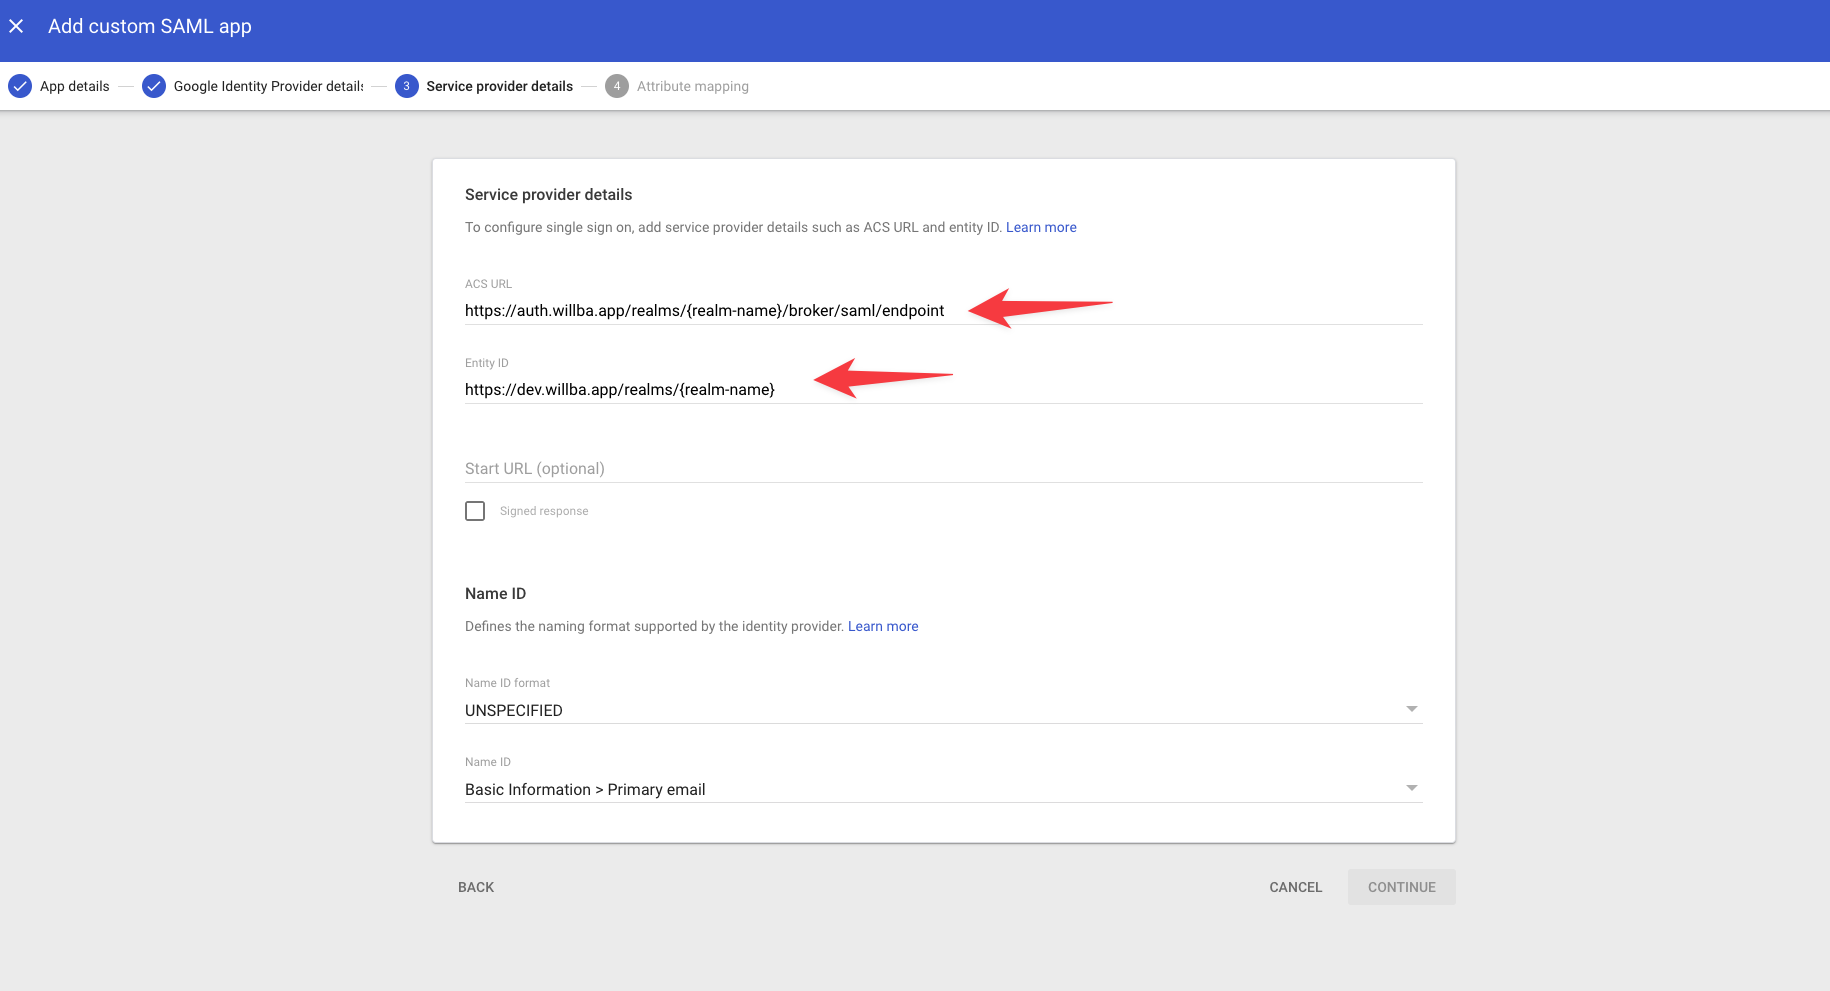
- Configure the SAML settings with the following values:
- ACS URL:
https://auth.willba.app/realms/{realm-name}/broker/saml/endpoint - Entity ID:
https://auth.willba.app/realms/{realm-name}
- ACS URL:
Replace {realm-name} with the value provided by your Willba contact person.
- Map the attributes as follows: firstName, lastName, email (see image below for reference).
- Add relevant Google Groups into Group membership mapping. Use App attribute name
groups - Click
Finishto complete the app configuration.
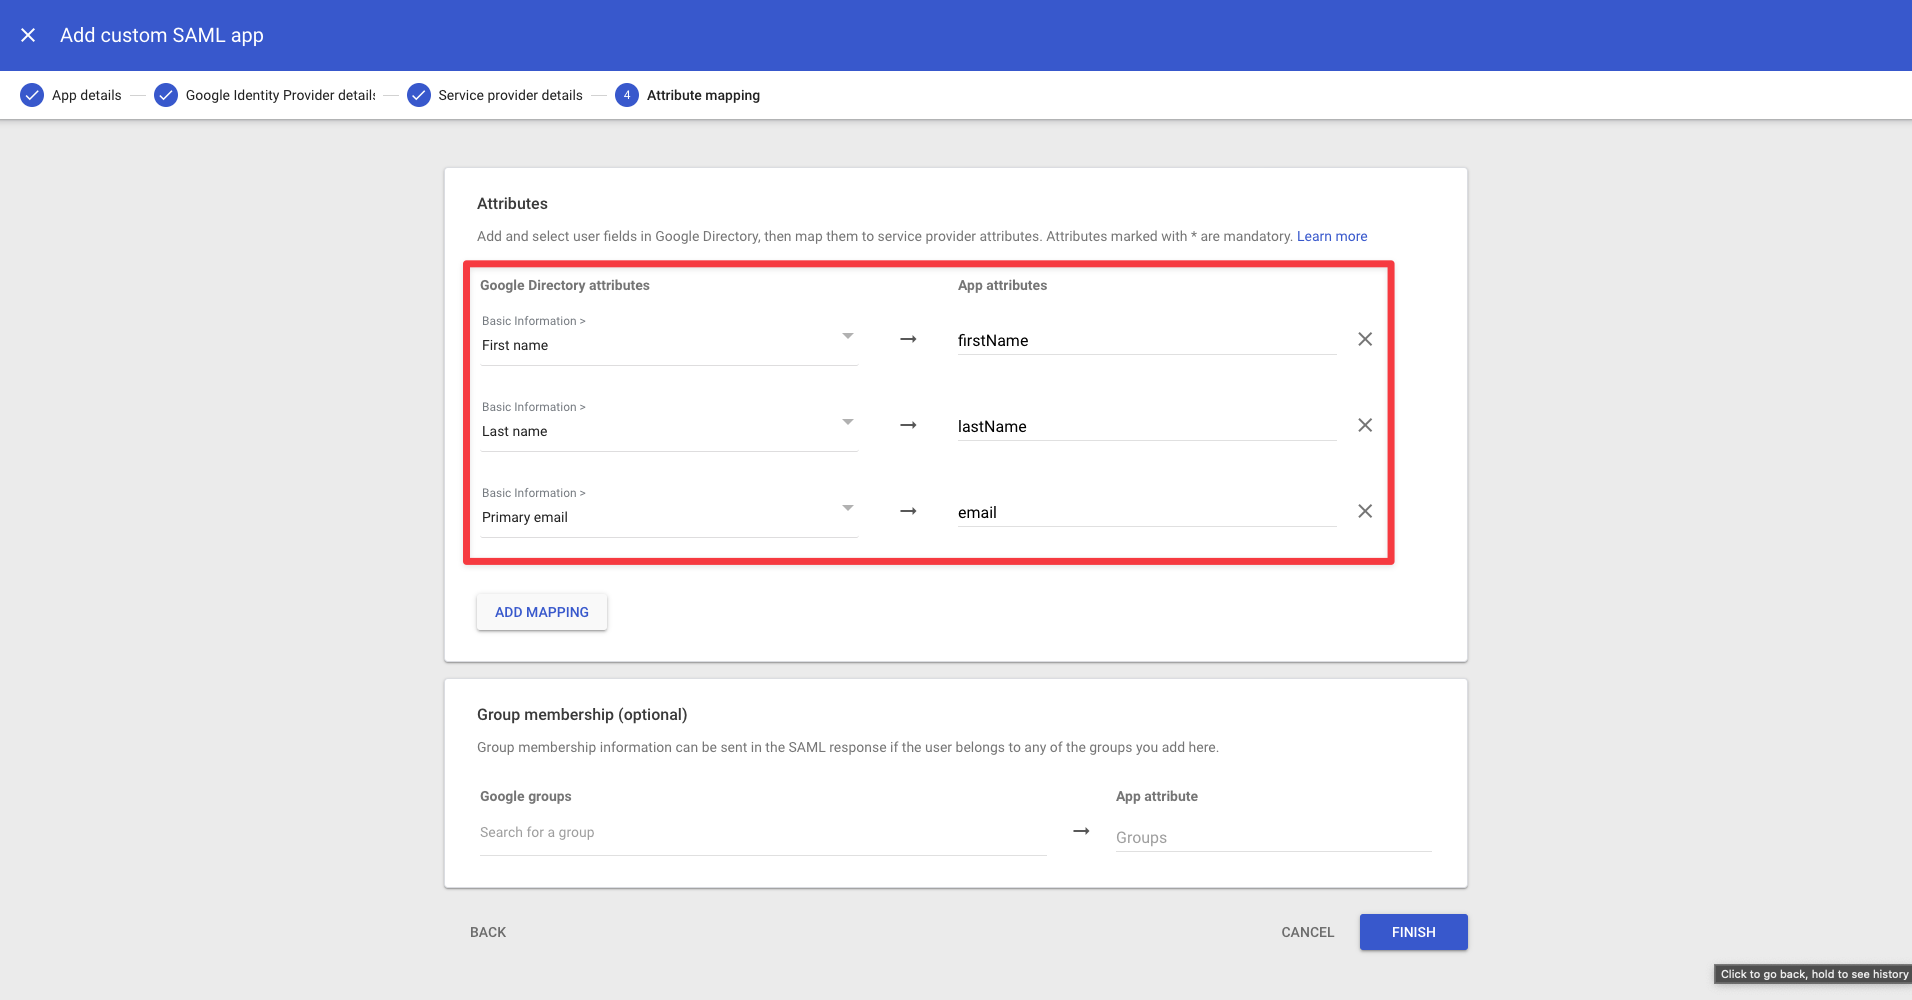
Take screenshot(s) of your attribute mappers to share it with your Willba contact person.
Step 3: User Access Setup
- Navigate to
User Accesswithin the app settings. - Set the application status to
ON for everyone. - Click
Saveto apply the changes.
This process allows all users in your Google Workspace to access Willba via SSO (Single Sign-On) functionality.
You can also specify the organisation unit or group if only some should have access.
Step 4: Finalization
The login will work after the Willba contact person adds the SAML settings to the application.
Make sure to test the setup with a few users to confirm everything is working as expected. If you encounter any issues, please reach out to your Willba contact person.
Documentation for Keycloak SAML settings for Willba contact person.